
Chevrolet Cruze Repair Manual: Removal Procedure
Warning: Refer to Approved Equipment for Collision Repair Warning in the Preface section.
Warning: Refer to Glass and Sheet Metal Handling Warning in the Preface section.
- Disable the SIR System. Refer to SIR Disabling and Enabling.
- Disconnect the negative battery cable. Refer to Battery Negative Cable Disconnection and Connection.
- Remove all related panels and components.
- Visually inspect the damage. Repair as much of the damage as possible.
- Remove the sealers and anti-corrosion materials from the repair area, as necessary. Refer to Anti-Corrosion Treatment and Repair.
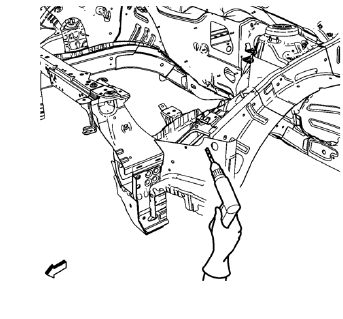
- Locate and mark all the necessary factory welds of the front wheelhouse panel rear reinforcement.
- Drill all factory welds. Note the number and location of welds for installation of the service assembly.
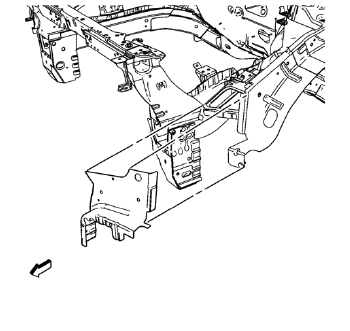
- Remove the front wheelhouse panel rear reinforcement.
 Front Wheelhouse Panel Rear Reinforcement Replacement (MIG-Brazing)
Note: According to different corrosion warranties, only the
regional mandatory joining methods are allowed. ...
 Installation Procedure
Create 5 x 18 mm (4/16 x 11/16 in) slots for MIG-Brazing along the edges
of the front wheelhouse panel rear reinforcement as
noted from the original panel.
Create a 5 x 18 mm (4/ ...
Other materials:
Interior Lighting
Dome Lamps
The dome lamp controls are located in the headliner.
: Press to turn the lamps off, even
when a door is open.
: Press to turn the lamps on automatically
when a door is opened.
: Press to turn on the dome lamps.
Reading Lamps
The reading lamps are located in the overhead con ...
Battery
Refer to the replacement number on the original battery label when a new battery
is needed.
WARNING
Battery posts, terminals, and related accessories contain lead and lead compounds,
chemicals known to the State of California to cause cancer and reproductive harm.
Wash hands after handling.
...
Air Conditioning Compressor and Condenser Hose Replacement (1.6L LDE, LXV,
and 1.8L 2H0)
Removal Procedure
Recover the refrigerant. Refer to Refrigerant Recovery and Recharging
Remove front bumper fascia. Refer to Front Bumper Fascia Replacement
Remove A/C compressor and condenser hose nut (1) from A/C condenser (2).
Remove A/C compressor and condenser hose bol ...
