Chevrolet Cruze Repair Manual: Removal Procedure
Warning: Refer to Approved Equipment for Collision Repair Warning in the Preface section.
- Disable the SIR System. Refer to SIR Disabling and Enabling.
- Disconnect the negative battery cable. Refer to Battery Negative Cable Disconnection and Connection.
- Remove all related panels and components.
- Visually inspect the damage. Repair as much of the damage as possible.
- Remove the sealers and anti-corrosion materials from the repair area, as necessary. Refer to Anti-Corrosion Treatment and Repair.
- Locate and mark all factory welds.
- Drill all factory welds. Note the number and location of welds for installation of the service assembly.
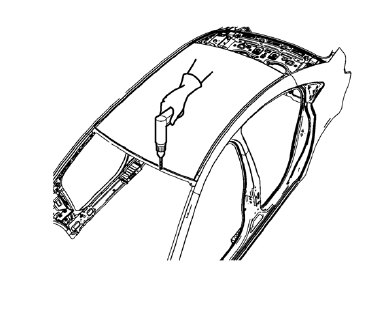
- Cut the adhesive with an appropriate tool.
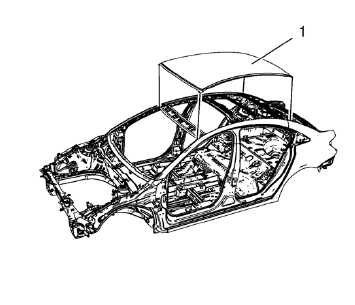
- Remove the damaged roof panel (1).
 Roof Outer Panel Replacement (MAG-Welding)
Note: According to different corrosion warranties, only the
regional mandatory joining methods are allowed ...
 Installation Procedure
Drill 8 mm (5/16 in) for plug welding along the edges of the service
panel as noted from the original panel.
Clean and prepare the attaching surfaces for welding.
Apply one-part ...
Other materials:
Exterior Care
Washing the Vehicle
To preserve the vehicle's finish, wash it often and out of direct sunlight.
Notice: Do not use petroleum-based, acidic, or abrasive cleaning agents
as they can damage the vehicle's paint, metal, or plastic parts.
If damage occurs, it would not be covered by the vehic ...
Installation Procedure
Note: If the location of the original plug weld holes can not be
determined, space the braze holes every 40 mm (1½ in).
Create 5 x 18 mm (4/16 x 11/16 in) slots for MIG-brazing along the edges
of the rear floor panel filler as noted from the original
panel.
Clean and prepare ...
Older Children
Older children who have outgrown booster seats should wear the vehicle safety
belts.
The manufacturer instructions that come with the booster seat state the weight
and height limitations for that booster. Use a booster seat with a lap-shoulder
belt until the child passes the fit test below: ...
