Chevrolet Cruze Repair Manual: Seat Belt Latch Stop Installation
Preliminary Procedure
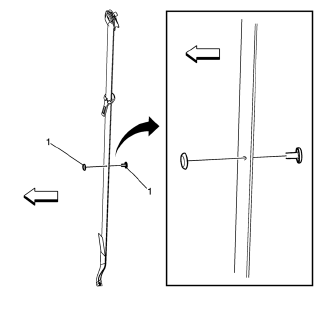
- Locate the hole in the seat belt webbing where the original seat belt stop button was located.
- If the original hole in the seat belt webbing is not visible, perform the following:
- If either the right or left stop button is missing use the opposing seat belt as a reference.
- With the opposing seat belt fully stowed, measure the distance between the seat belt lower anchor and the stop button.
- Using the measurement obtained above, measure and mark the location of the missing stop button on the center of the seat belt webbing.
- Ensure the seat belt latch plate is located above the mark or original hole.
Seat Belt Stop Button
Procedure
- Work the male half of the stop button through the hole in the webbing or at the marked location.
- Align the female half of the stop button with the male half of the stop button.
- Snap the two halves together.
- Trim off any access of the male half of the stop button flush with the female half of the stop button.
Tip
Ensure the male half of the stop button is facing forward in the vehicle in order to ensure the stop button will not snag customers clothing.
Driver or Passenger Seat Belt Buckle Replacement
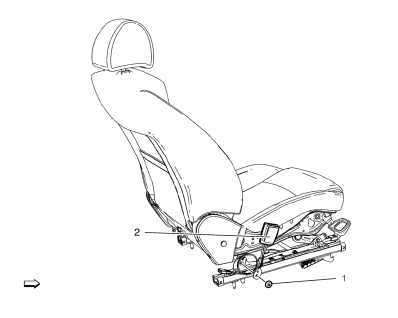
Preliminary Procedure
Remove the front seat. Refer to Driver or Passenger Seat Replacement.
Front Seat Belt Buckle Bolt
Caution: Refer to Fastener Caution in the Preface section.
Tighten 45 N·m (33 lb ft)
Front Seat Belt Buckle Assembly
Rear Seat Buckle Side Belt Replacement
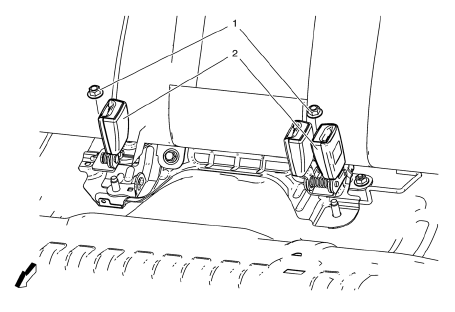
Preliminary Procedure
Remove the Rear Seat Cushion. Refer to Rear Seat Cushion Replacement.
- Rear Seat Rear Bracket Nut
Caution: Refer to Fastener Caution in the Preface section.
Tighten 45 N·m (33 lb ft)
- Rear Seat Belt Buckle Assembly
Rear Seat Center Shoulder Belt Replacement
Preliminary Procedure
Remove the right rear seat back cushion cover and pad. Refer to Rear Seat Back Cushion Cover and Pad Replacement - Right Side.
- Rear Seat Center Shoulder Belt Nut
Caution: Refer to Fastener Caution in the Preface section.
Tighten 45 N·m (33 lb ft)
- Rear Seat Center Shoulder Belt Assembly
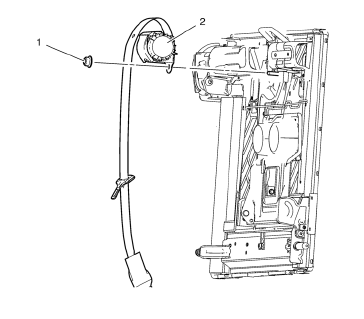
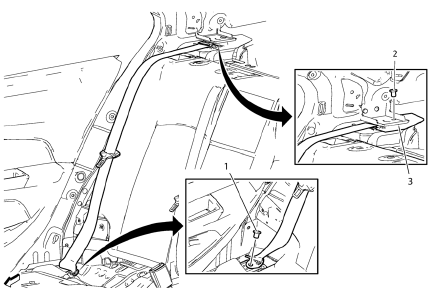
Shoulder Belt Replacement - Rear
Preliminary Procedure
- Remove the body side trim panel. Refer to Body Side Trim Panel Replacement - Left Side.
- Remove the rear window panel trim. Refer to Rear Window Panel Trim Replacement.
- Rear Seat Shoulder Belt Anchor Plate Bolt
Caution: Refer to Fastener Caution in the Preface section.
Tighten 45 N·m (33 lb ft)
- Rear Seat Shoulder Belt Retractor Bolt
Tighten 45 N·m (33 lb ft)
- Rear Seat Shoulder Belt Assembly
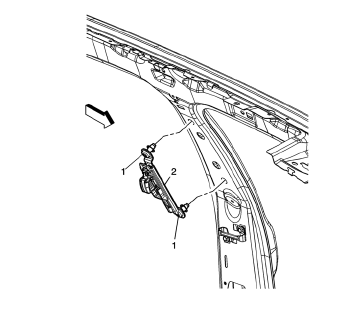
Driver or Passenger Seat Shoulder Belt Guide Adjuster Replacement
Preliminary Procedure
Remover center pillar upper garnish molding. Refer to Center Pillar Upper Garnish Molding Replacement.
- Front Seat Shoulder Belt Guide Adjuster Bolt (Qty: 2)
Caution: Refer to Fastener Caution in the Preface section.
Tighten 45 N·m (33 lb ft)
- Front Seat Shoulder Belt Guide Adjuster Assembly
 Repairs and Inspections Required After a Collision
Warning: Restraint systems can be damaged in a collision. To help
avoid injury and ensure that all parts in need of replacement are
replaced:
Replace any seat belt system that was in use during ...

Other materials:
Older Children
Older children who have outgrown booster seats should wear the vehicle safety
belts.
The manufacturer instructions that come with the booster seat state the weight
and height limitations for that booster. Use a booster seat with a lap-shoulder
belt until the child passes the fit test below: ...
Traction Control System (TCS)
The vehicle has a Traction Control System (TCS) that limits wheel spin.
On a front-wheel-drive vehicle, the system operates if it senses that one or
both of the front wheels are spinning or beginning to lose traction. When this happens,
the system brakes the spinning wheel(s), and/or reduces en ...
Stabilizer Shaft Link Replacement
Preliminary Procedure
Raise and support the vehicle. Refer to Lifting and Jacking
the Vehicle.
Remove the front tire and wheel assemblies. Refer to Tire and Wheel
Removal and Installation.
Stabilizer Shaft Link Nut (Qty: 2)
Caution: Refer to Fastener Caution in the Pr ...
