Chevrolet Cruze Repair Manual: Backup Lamp Replacement
Preliminary Procedures
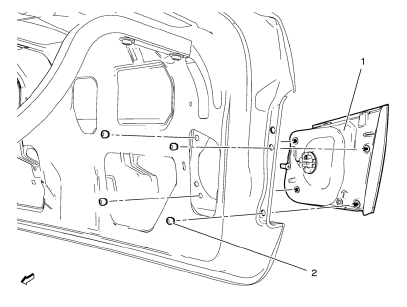
- Remove the rear compartment sill trim plate. Refer to Rear Compartment Sill Trim Plate Replacement.
- Disconnect the electrical harness connector from the backup lamp socket.
- Back Up Lamp Nut (Qty: 4)
Caution: Refer to Fastener Caution in the Preface section.
Tighten 5 N·m (44 lb ft)
- Back Up Lamp Assembly
Warning: Refer to Glass and Sheet Metal Handling Warning in the Preface section.
Warning: Refer to Halogen Bulb Warning in the Preface section.
Procedure
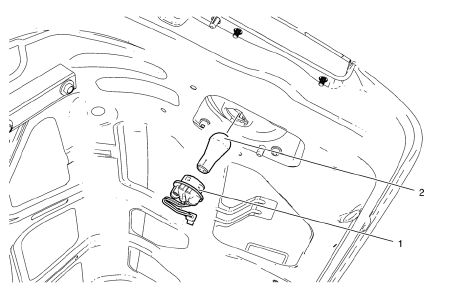
- Reach inside the rear compartment lid inner panel and remove the lower and upper retainer nuts securing the lamp assembly to the outer rear compartment lid panel.
- Push the inside edge of the lamp assembly outward from the rear outer compartment lid panel.
- Remove and transfer the bulb socket from the back up lamp assembly.
Backup Lamp Bulb Replacement
Warning: Refer to Glass and Sheet Metal Handling Warning in the Preface section.
Preliminary Procedure
Remove the rear compartment sill trim plate. Refer to Rear Compartment Sill Trim Plate Replacement.
- Back Up Lamp Socket
Tip
Rotate the lamp socket counterclockwise and remove from the tail lamp housing.
- Back Up Lamp Bulb
Warning: Refer to Halogen Bulb Warning in the Preface section.
Procedure
Remove the bulb from the lamp socket.
 Fog Lamp Aiming
Preparation Procedure
Important: Horizontal aim is not adjustable on this vehicle.
Vertical aim is done by an adjusting nut located on the rear of the fog lamp.
Prior to aiming the fog lamps, pe ...
 Forward Lamp Wiring Harness Replacement
Preliminary Procedures
Remove the front bumper. Refer to Front Bumper Fascia Replacement.
Remove the headlamp. Refer to Headlamp Replacement.
Using a scan tool, check for DTCs.
Forward ...
Other materials:
Ultrasonic Parking Assist
The Ultrasonic Rear Parking Assist (URPA) system assists the driver with parking
and avoiding objects while in R (Reverse). URPA operates at speeds less than 8 km/h
(5 mph). The sensors on the rear bumper detect objects up to 2.5m (8 ft) behind
the vehicle, and at least 20 cm (8 in) off the gr ...
Fuel
Use of the recommended fuel is an important part of the proper maintenance of
this vehicle. To help keep the engine clean and maintain optimum vehicle performance,
we recommend the use of gasoline advertised as TOP TIER Detergent Gasoline.
Look for the TOP TIER label on the fuel pump to ensure ...
Securing Child Restraints (Rear Seat)
When securing a child restraint in a rear seating position, study the instructions
that came with the child restraint to make sure it is compatible with this vehicle.
If the child restraint has the LATCH system.
Do not secure a child seat in a position without a top tether anchor if a national
...
