Chevrolet Cruze Repair Manual: Brake Pedal Position Sensor Calibration
Calibration Criteria
Note: Do not apply the brake pedal during the brake pedal position (BPP) sensor calibration procedure. Any movement of the brake pedal during this procedure will cause the calibration procedure to fail. If this occurs, the sensor calibration must be repeated.
Brake pedal position (BPP) sensor calibration must be performed after the sensor or body control module (BCM) have been serviced. The calibration procedure will set the sensor home value. This value is used by the BCM to determine the action of the driver applying the brake system and to provide this information to the vehicle subsystems via serial data.
Calibration Procedure
- Apply the parking brake.
- Place the transmission in the PARK position.
- Install a scan tool.
- Clear all BCM DTCs before proceeding.
- Navigate to the Vehicle Control Systems menu.
- Select Module Setup menu item.
- Select BCM menu item
- Select the BPP Sensor Calibration procedure and follow the directions displayed on the screen.
Brake Pedal Position Sensor Replacement
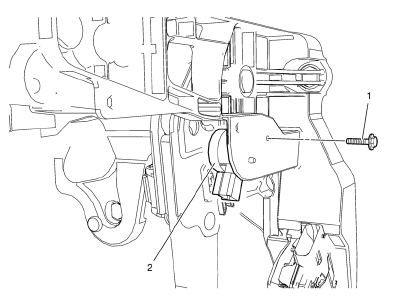
Preliminary Procedure
Remove the instrument panel lower trim pad cover. Refer to Instrument Panel Lower Trim Pad Cover Replacement.
- Brake Pedal Position Sensor Bolt
Caution: Refer to Fastener Caution in the Preface section.
Tighten 2 N·m (18 lb in)
- Brake Pedal Position Sensor
Procedure
- Disconnect 1. the electrical connector.
- Calibrate the brake pedal position sensor. Refer to Brake Pedal Position Sensor Calibration.
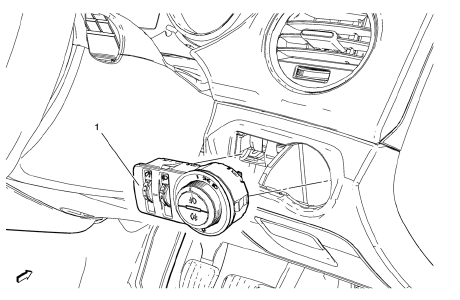
Headlamp Switch Replacement (Right Hand Drive)
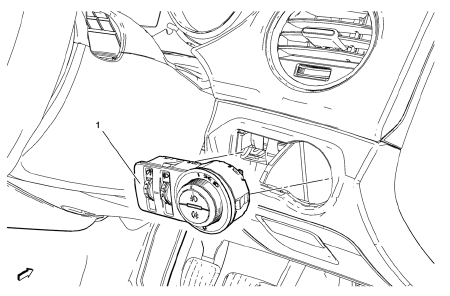
Headlamp Switch Assembly
Procedure
- Open the compartment to remove the headlamp switch.
- Disconnect the electrical connection.
Fog Lamp Switch Replacement (Right Hand Drive)
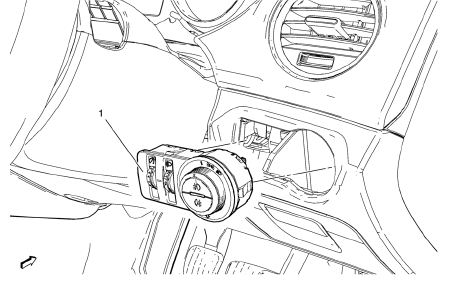
Fog Lamp Switch
Procedure
- Disconnect the electrical connection.
- Squeeze tabs on switch to unsnap from housing bracket.
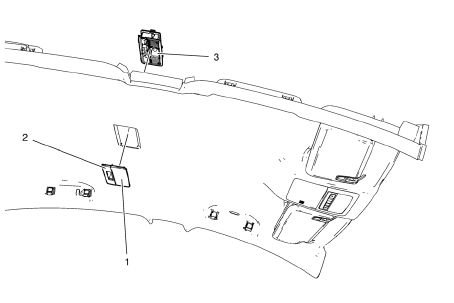
Hazard Warning Switch Replacement
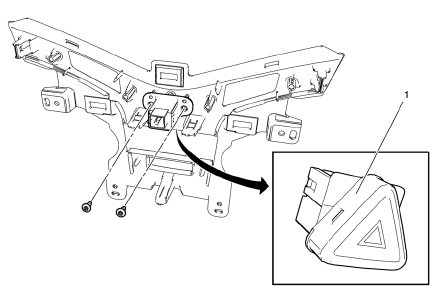
Preliminary Procedure
Remove instrument panel accessory bezel. Refer to Instrument Panel Accessory Bezel Replacement.
Hazard Warning Switch
Procedure
- Disconnect the electrical connection.
- Unsnap switch from instrument panel accessory bezel.
Instrument Panel Lamp Dimmer Switch Replacement (Right Hand Drive)
Instrument Panel Lamp Dimmer Switch
Procedure
- Disconnect electrical connector.
- Squeeze tabs on switch to unsnap from housing bracket.
Reading Lamp Bulb Replacement
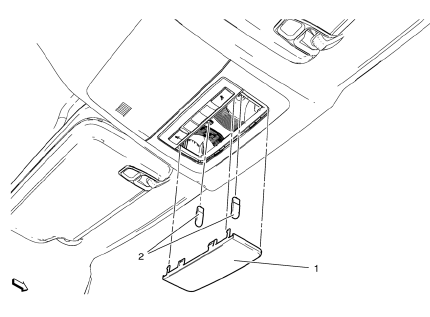
- Dome and Reading Lamp Lens
- Reading Lamp Bulb (Qty: 2)
Dome and Reading Lamp Lens Replacement
- Dome and Reading Lamp Lens
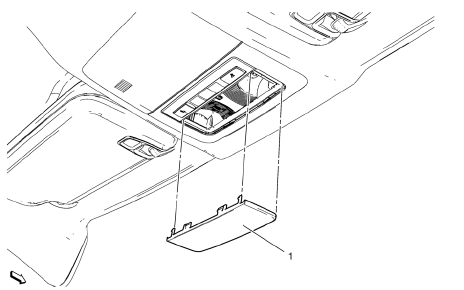
Dome Lamp Replacement
Preliminary Procedure
Lower the headliner enough to gain access to the dome lamp housing. Refer to Headlining Trim Panel Replacement.
- Dome Lamp Lens
- Dome Lamp Switch Bezel
- Dome Lamp Housing Assembly
Procedure
- Carefully use a flat-bladed tool, and release the tabs retaining the dome lamp to the headliner.
- Disconnect the electrical connector.
Dome Lamp Bulb Replacement
- Dome and Reading Lamp Lens
- Dome Lamp Bulb
 Lighting
Specifications
Headlights/Daytime Running Lights (DRL) Schematics
Interior Lights Schematics
...
 Headlamp Replacement
Preliminary Procedure
Remove the front bumper fascia upper bracket. Refer to Front Bumper Fascia
Replacement.
Headlamp Screw (Qty: 4)
Caution: Refer to Fastener Caution in the Preface se ...
Other materials:
SIR Identification Views
The SIR Identification Views shown below illustrate the approximate location
of all SIR components available for the vehicle. This will assist
in determining the appropriate SIR Disabling and Enabling for a given service
procedure, refer to SIR Disabling and Enabling.
Front End Sensor-- ...
Steering Linkage Outer Tie Rod Replacement
Preliminary Procedure
Remove the tire and wheel assembly. Refer to Tire and Wheel Removal and
Installation.
Steering Linkage Tie Rod Nut
Caution: Refer to Fastener Caution in the Preface section.
Tighten
35 N·m (26 lb ft)
Steering Linkage Inner Tie Rod Nut
Tighten
60 N·m (44 ...
Installation Procedure
Align the rocker inner panel.
Clean and prepare the attaching surfaces for spot welding.
Apply structural adhesive to all attaching surfaces.
Position the rocker inner panel on the
vehicle.
Verify the fit of the quarter outer panel
Clamp the rocker inner panel into posi ...
