
Chevrolet Cruze Repair Manual: Front Side Door Weatherstrip Replacement - Body Side
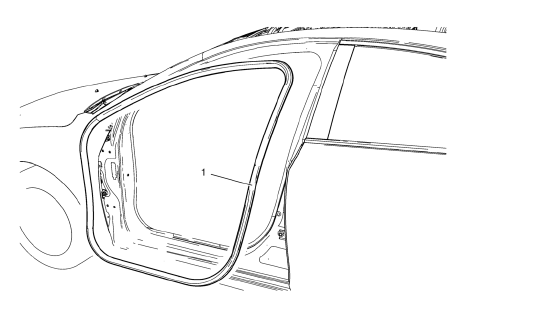
Front Side Door Weatherstrip - Body Side
Procedure
- Start at the rear upper corner of the door opening and pull the weatherstrip away from the door opening flange.
- Position the weatherstrip in the upper corner of the center pillar.
- Working downward along the front edge, install the weatherstrip on the door opening flange ensuring that the carrier is fully seated in the corners.
- Using a rubber mallet, ensure that the weatherstrip is seated on the entire door opening flange.
 Front Side Door Weatherstrip Replacement - Door Side
Front Side Door Check Bolt
Caution: Refer to Fastener Caution in the Preface section.
Tighten
25 N·m (19 lb ft)
Front Side Door Weatherstrip - Door Side
Procedure
Unclip weath ...
 Rear Compartment Lid Weatherstrip Replacement
Rear Compartment Lid Weatherstrip
Procedure
Start at the upper corner of the rear compartment opening and pull the
weatherstrip away from the rear
compartment opening flange.
Position ...
Other materials:
Installation Procedure
Clean and prepare the attaching surfaces for welding.
Apply structural adhesive to the attaching flanges.
Position the body side outer lower panel on the vehicle
Verify the fit of the body side outer lower panel.
Clamp the body side outer lower panel into position.
Spot ...
Low-Profile Tires
If the vehicle has P225/45R18 size tires, they are classified as low‐profile
tires. These tires are designed for very responsive driving on wet or dry pavement,
however, may produce more road noise and tend to wear faster.
Notice: Low-profile tires are more susceptible to damage from road ...
Automatic Dimming Rearview Mirror
To adjust the inside rearview mirror, hold the rearview mirror in the center
and move it to view the area behind the vehicle.
For vehicles with an automatic dimming rearview mirror, the mirror will automatically
reduce the glare from the headlamps from behind.
The dimming feature and the indic ...
