Chevrolet Cruze Repair Manual: Rear Compartment Lid Weatherstrip Replacement
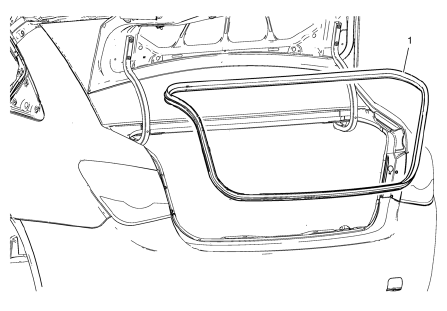
Rear Compartment Lid Weatherstrip
Procedure
- Start at the upper corner of the rear compartment opening and pull the weatherstrip away from the rear compartment opening flange.
- Position the weatherstrip in the upper corner of the r 2. ear compartment opening.
- Working downward along the edge, install the weatherstrip on the rear compartment opening flange ensuring that the carrier is fully seated in the corners.
- Using a rubber mallet, ensure that the weatherstrip is seated on the entire trunk opening flange.
 Front Side Door Weatherstrip Replacement - Body Side
Front Side Door Weatherstrip - Body Side
Procedure
Start at the rear upper corner of the door opening and pull the
weatherstrip away from the door opening flange.
Position th ...
 Rear Side Door Weatherstrip Replacement - Door Side
Rear Side Door Check Bolt
Caution: Refer to Fastener Caution in the Preface section.
Tighten
25 N·m (19 lb ft)
Rear Side Door Weatherstrip - Door Side
Procedure
Unclip weather ...
Other materials:
Interior Lamps Dimming
This group includes lamps which may dim. This group may use a combination of
vacuum fluorescent illumination, LEDs and incandescent
lamps
HVAC control module, head assembly
Rear HVAC control module, head assembly
Radio
Rear seat audio
The instrument panel cluster
The PRNDL lamp, wit ...
Removal Procedure
Warning: Refer to Approved Equipment for Collision Repair Warning in the
Preface section.
Warning: Refer to Glass and Sheet Metal Handling Warning in the Preface section.
Disable the SIR System. Refer to SIR Disabling
and Enabling.
Disconnect the negative battery cable. Refer to ...
Tire Designations
Tire Size
The following is an example of a typical passenger vehicle tire size.
(1) Passenger (P-Metric) Tire: The United States version of a metric tire
sizing system. The letter P as the first character in the tire size means a passenger
vehicle tire engineered to standards set by the U.S. ...
