Chevrolet Cruze Repair Manual: Installation Procedure
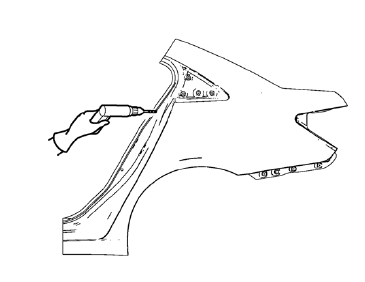
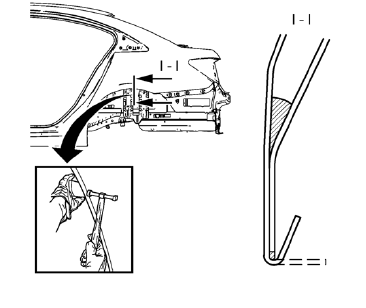
- Cut the quarter outer panel in corresponding locations to fit the remaining original panel. The sectioning joint should be trimmed to allow a gap of one-and-one-half-times the metal thickness at the sectioning joint.
- Create a 50 mm (2 in) backing plate from the unused portion of the service part.
- Drill 8 mm (5/16 in) along the sectioning cut on the remaining original part. Locate these holes 13 mm (1/2 in) from the edge of part and spaced 40 mm (1 1/2 in) apart.
- Prepare all mating surfaces as necessary.
- Fit the backing plates halfway into the sectioning joints, clamp in place and plug weld to the vehicle.
- Align the quarter outer panel.
- Drill 8 mm (5/16 in) for plug welding along the edges of the quarter outer panel as noted from the original panel.
- Clean and prepare the attaching surfaces for welding.

- Apply one-part windshield urethane adhesive (1) as noted from the original panel.
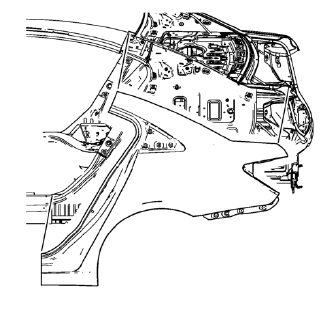
- Position the quarter outer panel on the vehicle.
- Verify the fit of the quarter outer panel.
- Clamp the quarter outer panel into position.
- Plug weld accordingly.
- To create a solid weld with minimum heat distortion, make 25 mm (1 in) stitch welds along the seam with 25 mm (1 in) gaps between them. Then go back and complete the stitch weld.
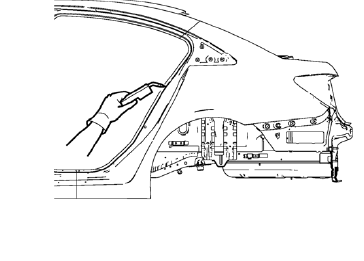
- Pre-flanging the flange with BO-6396 pliers and BO-6392 tool kit .
- Finish closing the wheelhouse flanging.
- Apply the sealers and anti-corrosion materials to the repair area, as necessary. Refer to Anti-Corrosion Treatment and Repair.
- Paint the repaired area. Refer to Basecoat/Clearcoat Paint Systems.
- Install all related panels and components.
- Connect the negative battery cable. Refer to Battery Negative Cable Disconnection and Connection.
- Enable the SIR system. Refer to SIR Disabling and Enabling.
 Removal Procedure
Warning: Refer to Approved Equipment for Collision Repair Warning in the
Preface section.
Warning: Refer to Collision Sectioning Warning in the Preface section.
Warning: Refer to Glass and She ...
 Quarter Outer Panel Sectioning (MIG-Brazing)
Special Tools
BO-6396 Bonding Pliers
BO-6392 Flanging Tool Kit
For equivalent regional tools, refer to Special Tools.
Note: According to different corrosion warranties, only the
regional m ...
Other materials:
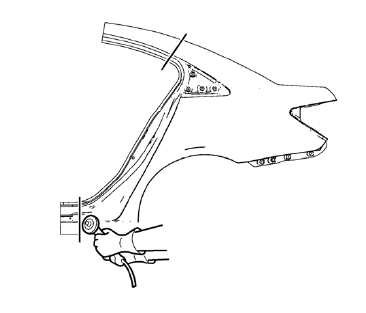
Removal Procedure
Warning: Refer to Approved Equipment for Collision Repair Warning in the
Preface section.
Warning: Refer to Glass and Sheet Metal Handling Warning in the Preface section.
Disable the SIR System. Refer to SIR Disabling and Enabling.
Disconnect the negative battery cable. Refer to Bat ...
Distracted Driving
Distraction comes in many forms and can take your focus from the task of driving.
Exercise good judgment and do not let other activities divert your attention away
from the road. Many local governments have enacted laws regarding driver distraction.
Become familiar with the local laws in your ...
Braking
Braking action involves perception time and reaction time. Deciding to push the
brake pedal is perception time. Actually doing it is reaction time.
Average driver reaction time is about three-quarters of a second. In that time,
a vehicle moving at 100 km/h (60 mph) travels 20m (66 ft), which co ...
