Chevrolet Cruze Repair Manual: Installation Procedure
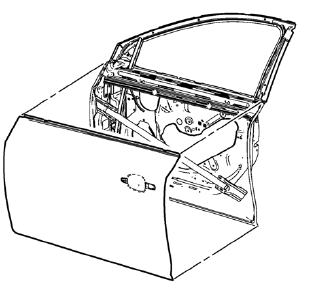
- Apply structural adhesive on the flanges of the front side door inner panel where the front side door outer panel bears on.
- Align the front side door outer panel.
- Verify the fit of the front side door outer panel.

- Clamp the front side door outer panel into position.
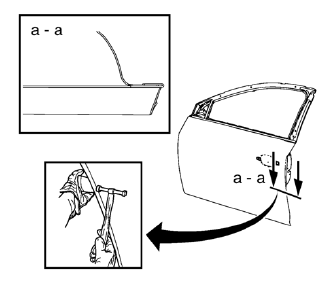
- Pre-flanging the flange with BO-6396 pliers and BO-6392 tool kit .

- Continue to hammer in stages along the hem flanges.
- Apply the sealers and anti-corrosion materials to the repair area, as necessary. Refer to Anti-Corrosion Treatment and Repair.
- Install the outside rearview mirror. Refer to Outside Rearview Mirror Replacement.
- Install the front side door outside handle. Refer to Front Side Door Outside Handle Replacement.
- Install the front side door. Refer to Front Side Door Replacement.
- Paint the repaired area. Refer to Basecoat/Clearcoat Paint Systems.
- Connect the negative battery cable. Refer to Battery Negative Cable Disconnection and Connection.
- Enable the SIR system. Refer to SIR Disabling and Enabling.
 Removal Procedure
Warning: Refer to Glass and Sheet Metal Handling Warning in the Preface
section.
Disable the SIR System. Refer to SIR Disabling
and Enabling.
Disconnect the negative battery cable. Re ...
 Rear Side Door Outer Panel Replacement (MAG-Welding)
Special Tools
BO-6396 Bonding Pliers
BO-6392 Flanging Tool Kit
For equivalent regional tools, refer to Special Tools.
Note: According to different corrosion warranties, only the
regional m ...
Other materials:
Floor Carpet Drying
If the carpet or the pad or insulator is wet, use the following criteria for
drying or for replacing the components:
For a 1-piece carpet assembly bonded to a cotton or a fiber padding,
replace the entire assembly
For a 2-piece carpet assembly with a cotton or a fiber padding, replace
...
Headlamp High/Low-Beam Changer
(Headlamp High/Low-Beam Changer):
Push the turn signal lever away from you and release to turn the high beams on.
To return to low beams, push the lever again or pull it toward you and release.
This indicator light turns on in the instrument cluster when the high-beam headlamps
are on. ...
Wiper/Washer System Description and Operation
Wiper/Washer System Components
The wiper/washer system consists of the following electrical components:
Windshield Wiper Relay
Windshield Wiper Speed Control Relay
Windshield Washer Pump Relay
Rain Sensor (optional)
Windshield Washer Fluid Pump
Windshield Wiper Motor
Window Wiper/Wa ...
