Chevrolet Cruze Repair Manual: Rear Side Door Stationary Window Replacement
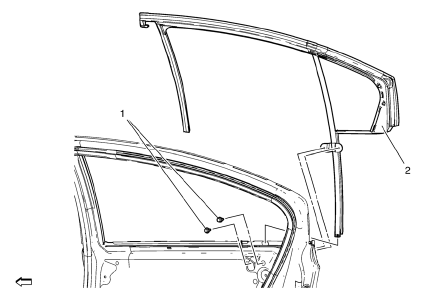
Preliminary Procedures
- Remove the rear side door trim panel. Refer to Rear Side Door Trim Replacement.
- Remove the rear side water deflector. Refer to Rear Side Door Water Deflector Replacement.
- Remove the rear door window outer sealing strip. Refer to Rear Side Door Window Outer Sealing Strip Replacement.
- Remove the rear side door window. Refer to Rear Side Door Window Replacement.
- Rear Side Door Stationary Window Bolt (Qty: 2)
Caution: Refer to Fastener Caution in the Preface section.
Tighten 8 N·m (71 lb in)
- Rear Door Stationary Window
Tip: Pull the bulb straight from the lamp harness socket.
 Rear Side Door Window Replacement
Preliminary Procedures
Position the window approximately half way down in the door.
Remove the water deflector. Refer to Rear Side Door Water Deflector
Replacement.
Remove the out ...
 Rear Window Replacement
Special Tools
BO-46974 Glass removal system
BO-641 Suction Holder
For equivalent regional tools, refer to Special Tools. ...
Other materials:
Bluetooth Audio
If equipped, music may be played from a paired Bluetooth device.
To play music through a Bluetooth device:
1. Power on the device, pair, and connect the device.
2. Music can be launched by doing one of the following:
• Press the Bluetooth Audio screen button on the Home Page.
• Press SOURCE or ...
Front Lower Control Arm Bushing Replacement
Preliminary Procedure
Raise and support the vehicle. Refer to Lifting and Jacking the
Vehicle.
Remove the tire and wheel. Refer to Tire and Wheel Removal and
Installation.
Remove the lower control arm. Refer to Lower Control Arm Replacement.
Lower Control Arm Rear Bushing ...
Infotainment
Read the following pages to become familiar with the audio system's features.
WARNING
Taking your eyes off the road for extended periods could cause a crash resulting
in injury or death to you or others. Do not give extended attention to infotainment
tasks while driving.
This system provi ...
