Chevrolet Cruze Repair Manual: Instrument Panel and Console Trim
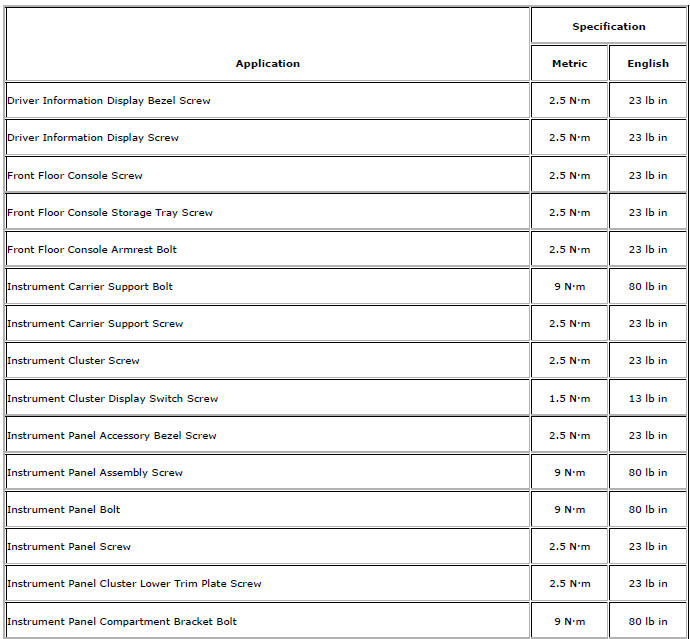
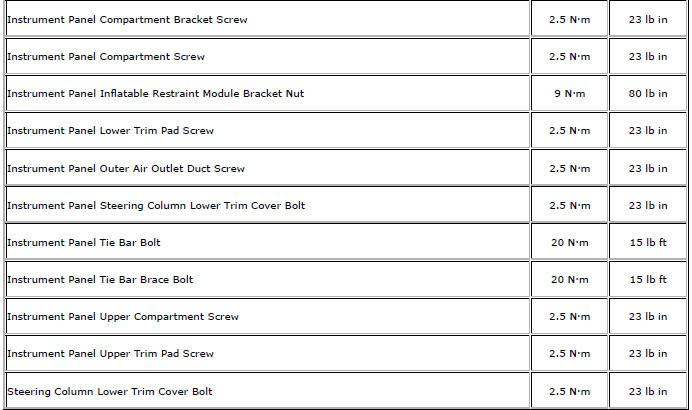
Specifications
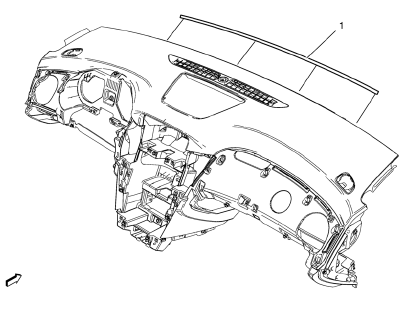
Instrument Panel Insulator Seal Replacement
Preliminary Procedure
Remove the instrument panel assembly. Refer to Instrument Panel Assembly Replacement.
- Instrument Panel Insulator Seal
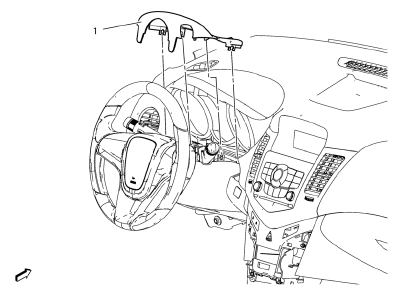
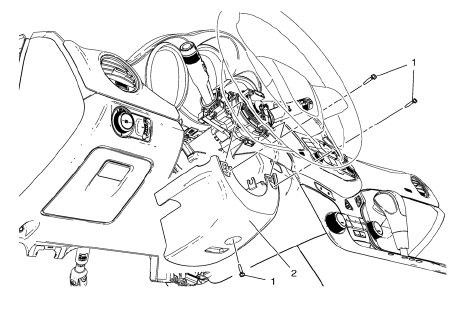
Steering Column Upper Trim Cover Replacement
Preliminary Procedure
Remove the instrument cluster. Refer to Instrument Cluster Replacement
- Instrument Panel Steering Column Upper Trim Cover Assembly
Steering Column Lower Trim Cover Replacement
Preliminary Procedure
Remove the steering column upper trim cover. Refer to Steering Column Upper Trim Cover Replacement.
- Steering Column Lower Trim Cover Bolt (Qty: 3) Caution: Refer to Fastener Caution in the Preface section.
Tighten 2.5 N·m (23 lb in)
- Instrument Panel Steering Column Lower Trim Cover Assembly
Instrument Panel Center Upper Molding Replacement
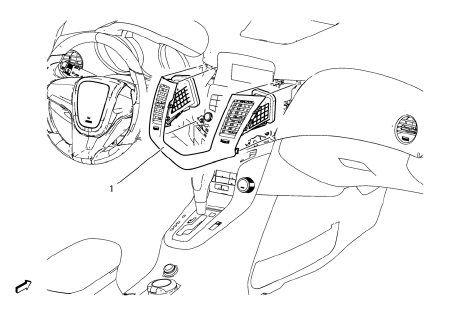
Instrument Panel Center Upper Molding Assembly
Procedure
- Use a flat-bladed plastic trim tool to remove the instrument panel center upper molding.
- When replacing the instrument panel center upper molding, remove both instrument panel center air outlet. Refer to Instrument Panel Center Air Outlet Replacement.
Instrument Panel Upper Trim Panel Replacement - Right Side
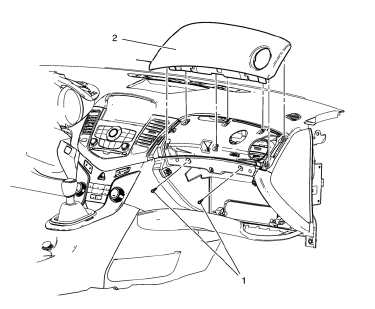
Preliminary Procedure
Remove the instrument panel compartment. Refer to Instrument Panel Compartment Replacement
- Instrument Panel Upper Trim Panel Screw (Qty 2) Caution: Refer to Fastener Caution in the Preface section.
Tighten 2.5 N·m (22 lb in)
- Instrument Panel Upper Trim Panel Assembly
Instrument Panel Upper Trim Panel Replacement - Left Side
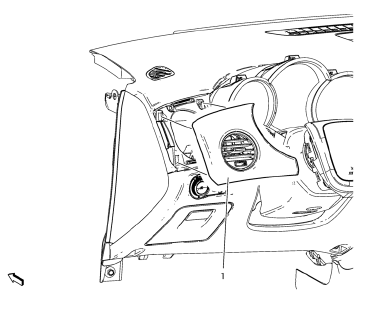
Preliminary Procedure
Remove instrument panel cluster. Refer to Instrument Cluster Replacement
- Instrument Panel Upper Trim Panel - Left Side
Tip
When replacing the instrument panel upper trim panel, transfer the instrument panel outer air outlet.
- Instrument Panel Accessory Bezel Replacement
- Instrument Panel Lower Trim Pad Cover Replacement
- Instrument Panel Cluster Lower Trim Plate Replacement
- Instrument Panel Lower Trim Panel Replacement - Right Side
- Instrument Panel Upper Compartment Replacement
- Instrument Panel Compartment Replacement
- Instrument Panel Upper Trim Pad Insert Replacement
- Instrument Panel Assembly Replacement
- Instrument Panel Tie Bar Replacement (Right Hand Drive)
- Instrument Panel Wiring Harness Replacement
- Front Floor Console Storage Tray Replacement
- Front Floor Console Replacement
- Roof Console Replacement
 Headlining Trim Panel Replacement (Without Sunroof)
Warning: Do not attempt to repair or alter the head impact
energy-absorbing material glued to the headliner or to the garnish
trims. If the material is damaged, replace the headliner and/or the ...
 Instrument Panel Accessory Bezel Replacement
Preliminary Procedure
Remove transmission control cover. Refer to Automatic or Manual Transmission
Control Lever Trim Cover Replacement.
Instrument Panel Accessory Bezel Screw (Qty: 4)
C ...
Other materials:
Exterior Care
Washing the Vehicle
To preserve the vehicle's finish, wash it often and out of direct sunlight.
Notice: Do not use petroleum-based, acidic, or abrasive cleaning agents
as they can damage the vehicle's paint, metal, or plastic parts.
If damage occurs, it would not be covered by the vehic ...
Rear Side Door Window Regulator Motor Replacement
Preliminary Procedure
Remove the rear side door window regulator. Refer to Rear Side Door Window
Regulator Replacement.
Rear Side Door Window Regulator Motor Screw (Qty: 3)
Caution: Refer to Fastener Caution in the Preface section.
Tighten
9 N·m (80 lb in)
Rear Side Door Window R ...
Engine Air Cleaner/Filter
When to Inspect the Engine Air Cleaner/Filter
Inspect the air cleaner/filter at the scheduled maintenance intervals and replace
it at the first oil change after each 80 000 km (50,000 mi) interval. If you are
driving in dusty/dirty conditions, inspect the filter at each engine oil change.
How ...
